Halloween fondant pumpkin tutorial

A couple of weeks ago, I decided to have a go at making some cute little pumpkins to go on top of Halloween cupcakes.

Fondant pumpkins

These are easy to make and don’t require any equipment beyond fondant, orange dye and toothpicks. (And green and brown dye if you want to make stalks, leaves and vines.)

Equipment

If you have orange fondant, well, you’re one step ahead… Hurrah! If you want them to be hard, you should make them a couple of weeks before when you need them, so you can sit them in a cool, dark place to set.

Fondant pumpkins, step one

First of all, roll your fondant into a small ball, then squash it down so it makes an oval. This will give it a much more interesting shape than a plain old sphere.

Fondant pumpkins, step two

Now it’s time to use your specialist equipment. First of all, pierce the centre to mark it. Then, rolling the toothpick, create a dimple in the centre of your ball.

Fondant pumpkins, step three

There you go – now you’ll have what looks like an orange doughnut gone wrong.

Fondant pumpkins, step four

Now, use your toothpick to create lines from the centre down the edge of your pumpkin, using a rocking motion. I do this by doing the four compass points, then filling in the spaces in between.

Fondant pumpkins, step five

Like so! With the heat of your fingers, your pumpkin might get a little floppy. You can fix this by placing it in the fridge at any point if it starts getting hard to handle. Don’t be a pushover for a vegetable made of sugar.

Fondant pumpkins, step six

That’s pretty much it! You can add a stalk (I’ve seen people use cloves for this, but obviously they’re not really edible like that) or even make a curly vine from green fondant curled around a matchstick.

Too cute to eat? Never!

Fondant flower tea party!

For my birthday, I decided I wanted a tea party, complete with cute little cup cakes and triangular sandwiches. Originally I was going to buy the sandwiches, but I couldn’t bring myself to spend £20 on a plate of them when I could make them myself for half the price. So R and I made batches of cream cheese and smoked salmon, rare roast beef with horseradish mayo, Belgian ham salad with dijonnaise and cheddar cheese with red onion chutney. Delicious!

But of course, I had to do something with all my cake decorating goodies!

Red and pink flowers

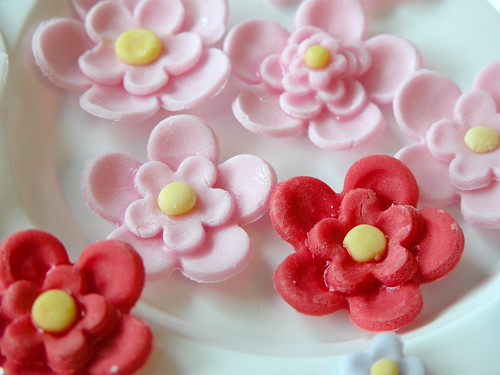
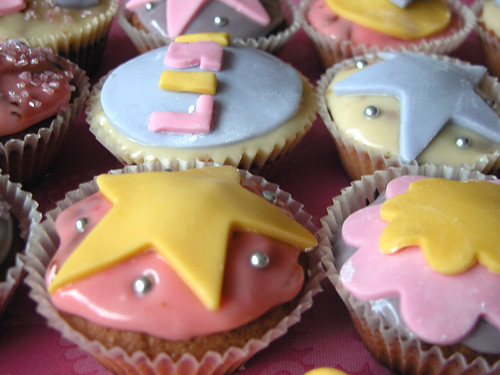
So R and I dyed some fondant with the Wilton paste colours I bought at Hobbycraft, and rolled it out. Then, we used the set of four blossom plunger cutters from PME to cut out these cute flowers.

Patchwork flower

I also tried out making a patchwork effect on some of the flowers using a spice brown food colouring pen. What do you reckon?

Pink patchwork

It worked well using that colour on the pink icing, because it turned a slightly darker pink. I’d like to play around with this idea more on other projects.

One of the things I really wanted to try from Peggy Porschen’s Cake Chic was her anemone flower – if you have the book, you might have seen it on the back on the cover. Everything I needed except the veining tool turned up from Jane Asher, but the anemone cutters were much smaller than I had thought they’d be. But as you can see, the flower still turned out pretty well!

Anemone

I decided to use ivory lustre powder instead of a pink blossom tint on this, and I think it came out quite well! The only thing is, the petals were very delicate and the whole thing got stuck in my palette when I tried to remove it. Totally tragic! But, I like the effect so much I might try doing the same thing with red petals to make poppies. The only things you can’t eat about this flower are the stamens, which are made of wire.

Flower palette

Here are the flowers sitting in the palette, drying off and getting a bit of shape to them. This is just a cheap plastic artist’s palette from eBay, which only cost a couple of pounds including postage, bonus! The perfect shape for little flowers. Don’t they look sweet? I’d leave them here if I didn’t have a load of cakes to decorate!

Side cakes

And here they are! Peggy Porschen’s cupcake and buttercream recipes. Her cake recipe calls for four eggs for 24 cupcakes, which seems like a lot, but works perfectly. Once you’ve baked them, she asks you to soak them in sugar syrup as well, which seems excessive, but does make a nice moist cake. The buttercream is nice, but I think I’m a bit over how sugary it is. It’s a bit toooo sweet.

Patchwork blue cake

Here’s one of my patchwork flowers on the top of a cupcake.

Baby pink flower cake

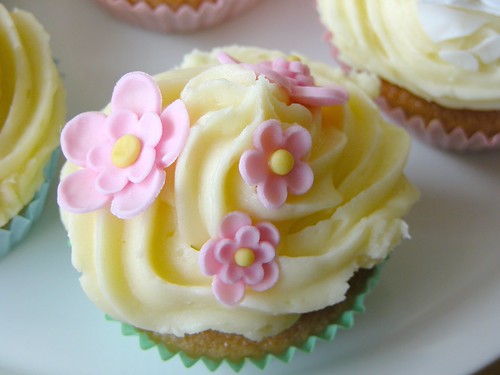
It’s so easy to decorate cupcakes with these – the plungers are really easy to use, and although I curved the petals with a boning tool and set them in a palette, you could skip these steps and they’d still sound great (get me, I sound like I know what I’m talking about!).

Baby blue flowers

I’m still not confident about piping on the buttercream – it never looks as good as other people’s, but luckily I think I’ll have plenty of opportunities to practice!

Flower cakes

Here they all are – pretty as a picture! But, please don’t look at my poor little anemone… It broke when I tried to take it out of the palette, and also when I tried to put it on the cupcake. Darn it!

Well, I had a lovely birthday thanks to my family and friends, and a great time trying out sugarcraft properly for the first time… I just wish I knew what to do with rose petal cutters!

The Shocking and Horrible Story of Lisa’s Cupcakes

My good friend Lisa, who lives an hour and a half away from me, and whom I don’t get to see very often, had her birthday a couple of weeks ago, so R and I had the fantastic idea of baking her a load of cupcakes and taking them with us when we went to visit.

Lisa's cake

So, we got to work. The plan was R would bake the cakes during the day, I would prepare the buttercream and organise cutters, and then we’d decorate them in the afternoon before we drove up.

Cakes vs Books

I made a new recipe for cream cheese frosting, which included delicious shards of caramel, making a great crunchy texture and smooth sweetness to contrast with the cream cheese.

Rachel's scary Care Bear

Rachel even made the world’s creepiest and disturbing Care Bear, which to me looks like one of those poignant social services adverts about broken childhoods.

Side on view

We dyed fondant all kinds of beautiful bright colours, cheerfully telling each other how much Lisa would love to see her gorgeous little cakes, and how much we’d appreciate it if someone made us some kick ass cakes for our birthdays.

Mixed cupcakes

Then, when we were halfway through, I remembered something somewhat vital.

Lisa's cupcakes

Something that, had we remembered before we started, would have been most useful indeed.

Sakura blossom cake

The last time we met her, Lisa told us she cannot eat flour.

Flowery cupcakes

She’s on a gluten-free diet.

Starry cupcakes

Oh pants.

Flowey cupcake

Sorry Lisa.

We hope you enjoyed looking at the cakes, anyway… Ah, fudge.

Please note, no Lisas were harmed during the making of these cakes, and also note that I did buy her a present she could use, unlike R, who bought her chocolate which now Lisa also cannot eat. We love you Lisa, please forgive us!