I have been waiting a long time to visit Lady Dinah’s Cat Emporium – the UK’s first ever cat cafe. I’ve been waiting since February 2013, to be exact, when I joined in with hundreds of other people on indiegogo.com to help get the business off the ground. I also covered the campaign in the magazine I edit, and waited patiently for the day to roll around when I could cash in my voucher for High Tea for Two – which was a present for my husband for Valentine’s day.
Tag: Fun
The London Color Run: Hints, Tips and Advice for the Happiest 5k on the Planet!
You know that advert where there’s some kind of amazing festival with everyone throwing coloured dye on each other, and it’s supposed to make you want to buy a car or a camera or something, but actually it just makes you want to run outside in a spray of yellow, purple and red, dancing around like a toddler hopped up on too much Haribo? Of course you do – how could you forget? Well, if you’re anything like me, once you have a dream in mind, you set about to find a way to make it happen. And, funnily enough, where there’s a dream, there’s usually someone ready to make that dream come true if you give them some money. To cut a long story short, earlier this month I went on the Color Run in Wembley, London. That’s basically what I’m trying to tell you.
Bag ‘n’ Shoes: Next Two Part Pointed Flats and Navy and White Striped Shopper
Summer for me is always nautical. I love nautical stuff, as I’m sure you’ve cannily realised from my previous posts. But you don’t have to spend a fortune on trends to get something stylish and practical, and one of my favourite places for affordable fashion is Next!
Zombies 5k: initial review
In early spring, I’m going to be motoring off with a bunch of other fine folks to take part in a crazy, mud-soaked 5k obstacle course. So, I decided, as a basic minimum, that I really should at least be able to run 5k before I get there… In comes Zombies 5k, an app I had already downloaded but never used – which sits in amongst a plethora of 5k apps that I download whenever I’m supposed to be doing Race for Life. This time, though, I’m pretty serious about making sure I prepare properly. So at the end of last month, I embarked on my first week of Zombie 5k training!
The app works with your phone (and is also available on Android) to track your distance and other fancy things, but the main feature of it that made me download was the storyline that’s woven into your progress as you run. You plug in your earphones, select a playlist from your music folder, and then in between tracks, narrators tell a story of a group of survivors of a zombie apocalypse, of which you are one, who are struggling to gather supplies. As Runner 5, you are put into training to venture out and gather items, and the narrators mix together plot points and training advice along the way to make each run seem like it’s building up to make you an elite, zombie-outrunning athlete.
These are screenshots from my phone to show the information that you gather as you run – and how you progress, from a series of short bursts of running interspersed with walking, to an hour’s worth of longer runs and walks in the final week. Unless you are incredibly unfit, it should be easy to get stuck into, and it follows a fairly typical route for most 5k training programmes.
One of my favourite parts about this programme, though, is the way that it captures lots of extra info that can be viewed online if you link your app to the website, www.zombiesrungame.com.
First of all, it tracks your overall distance and time, and also breaks down the total distances for each week as you go along, as well as informing you about the major plot points you’ve encountered so far. Week one workout three was especially fun for me, as I went with my parents and their mad dogs to Royal Victoria Country Park, where not only did I get dragged through the mud by an insane mutt, but I also got to experience an exciting storyline twist when I was asked to run outside the safety of the base in order to pick up some ammo for the township!
As you can see, if you choose to share this info, the website can track your progress on a map – which is the second aspect I really like. You can see exactly where you went, and even how fast you were going at each stage – right down to your speed for each individual song!
Royal Victoria Country Park is an amazing place to run, as it covers lots of different terrains, from a pavemented seafront, to a wooded area, and even a military cemetery. And here’s an interesting fact for you: the tower is what’s left of Royal Victoria Hospital, where the fictional Dr Watson from the Sherlock Holmes stories trained as a surgeon for the army!
Somehow, my app magically synched itself to my run and had me tearing down a side route (middle left) in order to pick up the aforementioned ammo. The accompanying insane canine was very happy to pull me far beyond my normal running pace and I ended up plunging through a series of muddy puddles of varying depths… But, considering I’m training for an obstacle course, I’d say it’s all part of the programme!
I’m definitely happy to have picked this method of training, and I’ll be sure to pick up my review at a later date in order to fill you in on my progress! Crazy as I sounds, I actually look forward to my thrice-weekly runs, and it’s a combination of a well-crafted learning curve, and an interesting storyline, that are keeping me coming back for more. Visit the app store to find Zombies 5k, or head to www.zombiesrungame.com for more info.
Outdoor Adventures: Time for Segway!
I love the outdoors – and I love trying new things. So when I got the chance to go on a Segway adventure this month, I jumped at the opportunity! Up until this point, I’d only ever seen Segways on the television (or on hilarious YouTube compilations of people falling off them…) and usually they’d been zooming around cities or transporting security guards around shopping centres. Bumbling around the woods on one sounded absolutely brilliant – and, actually, yes it was!
Segways aren’t without their challenges to overcome, however. For starters, they’re actually pretty intimidating beasts up close, and they can go pretty darn fast if you want them to. And, there’s a lot of safety equipment involved – helmets, elbow pads, shin pads – plus a fairly serious talk which basically dissuades you from acting like an idiot on them. These things are heavy, fast, and they have no brakes – all of which makes them enormous fun to ride on when you’re dodging between trees and zooming down hills.
After the safety briefing, we were invited to trundle up and down in between some cones to get the hang of maneuvering these beasts. While some people are cursed with bitchy resting face, I appear to be cursed with terrified resting face, because all the way through my practice (and the resulting rally through the trees) people kept asking me if I was okay. Firstly, I was concentrating on not falling off, but secondly, I was also having a blast, so I have no idea where the aura of terror was coming from, but I shall put it to good use this Halloween.
To start with, I found it difficult to get my head around how to move the Segway around. Even getting on it for the first time was a pretty intimidating experience, as you use your body weight to direct the movements. If you’re not centered, stepping onto the Segway can cause it to go forwards or backwards, which is hilariously terrifying the first time you get on one. But it doesn’t take very long at all to get used to it, and once you do, it becomes almost second nature. It’s almost like learning to ride a bike, except you don’t fall off, and your dad’s not standing there shouting at you. (Or was it just my dad that did that?)
So, the Segway moves forward when you move your body weight towards the front of the machine, and it stops when you rock it backwards. It’s almost counter intuitive to move this way to start, as your mind is telling you you’ll fall forwards if you tip so far, but after some practice it’s easy to master. Turning works in a similar way, you tilt your body weight in the direction you want to go in. Although it seems strange at first, by the end of the session these body movements, plus the speed, made it feel almost like you were flying through the trees like some kind of magical Disney princess. Of course, the men can just imagine they’re Superman or something – or a slightly hairy princess if they want, I’m not going to judge.
Once we had proven our mettle by not falling off our Segways, running over our own legs, going backwards into a ditch, or mangling ourselves in unlikely accidents, we set off on a short jaunt at high speed across a field and through some trees to a circular trackway in the woods. We then spent the remainder of our session looping around this circuit – firstly rather gingerly, and then with more and more confidence, until at the end it was entirely possible that one of us could have taken off if we’d had a big enough gust of wind behind us.
By the end of the session, everyone was grinning from ear to ear, as they returned their safety equipment and picked up their certificate. There’s just something about a Segway rally that makes you feel exhilarated and upbeat, and I can’t wait to go again. If you’re used to the same old outdoors activities and you want to try something different, or you’re looking for something fun for a birthday, hen party or team-building exercise, I’d definitely recommend it. It’s impossible not to have fun – and it’s also pretty hard to be really bad at it, too. And by the end, you feel like you’ve achieved something. I shall definitely be listing Segway Operator on my CV in the future.
You can book a Segway session from Activity Superstore. You can also book loads of amazing other activities on the site, from spa days to supercar drives! Check it out at www.activitysuperstore.com. I received a complimentary session for the purposes of my review, but my opinions are my own.
Itchen to get to the Park
Another Sunday, another Sky Ride: Itchen to get to the Park. This time, it was just me and Rachel. We braved the terrible weather and wound up doing half of the trip, opting to cycle back from the highlight, Itchen Valley Country Park, to our homes, instead of all the way back to the starting point. Personally, I would have preferred to continue, but it was pouring it down and Rachel didn’t have a jacket! That’s one downside to a mountain bike with no basket or panniers…
Here she is, during a dry spell! Everyone got the Sky Ride bibs again, which helped keep a bit of the rain off…
Anyway, getting a bit ahead of myself here – this was our route! We were five minutes late to the start yet again, this time because we just couldn’t find the area we were supposed to meet at. We cycled around the park and stumbled across by accident in the end – although some others arrived much later than we did!
As usual, there wasn’t any time to take photos during the ride itself, but I managed to take a few at Itchen Valley Country Park. Here, you can see how much it was raining on the day!
Brr!
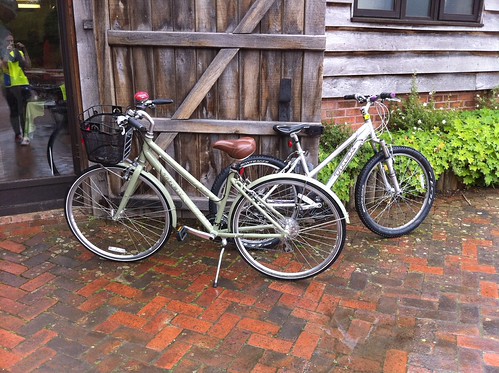
We stopped at the cafe and filled up the bike racks…
Rachel and I somehow missed the fact that there was an offroad cycle at the park itself, because we were busy getting ourselves coffee at the time… Still, it gave me a chance to show off my new helmet! More on that in another post…
Neither of us had our locks with us, so we brought our bikes around the back of the cafe and left them in plain sight by the door…
Here’s our friendly cycle group, still sheltering from the rain at the front of the barn!
As usual, the leaders were very friendly and helpful, and made sure everyone was safe and working to a pace they were comfortable with.
As we missed the off-road ride, when the group cycled off, we spent some more time at Itchen Valley exploring. Unfortunately, it turns out that the usual cycle track used at the site had been ruined by some vehicles which had left huge ruts down the centre, so we had to make do with cycling in the fields.
It was quite hilly and bumpy, and the wet grass was pretty challenging to cycle on, but I did all right! Unfortunately, cyclists aren’t allowed on the nature trails at the park – which is fine by me, as I also love walking too.
However, I did think it a bit strange that cycling was considered to be too stressful for the wildlife in the area, but that it was okay to have a brand new Go Ape adventure park installed in the same place!
That’s fine too – because I also love Go Ape and it’s great that there’s one now so close to where I live. Mind you, it’s still expensive – £30 per person.
What would Go Ape be without the obligatory ape statue to pose around?
To the left of the centre of this picture, you can see the zip line for the finale of the Go Ape experience – puts the one that’s already there to shame…
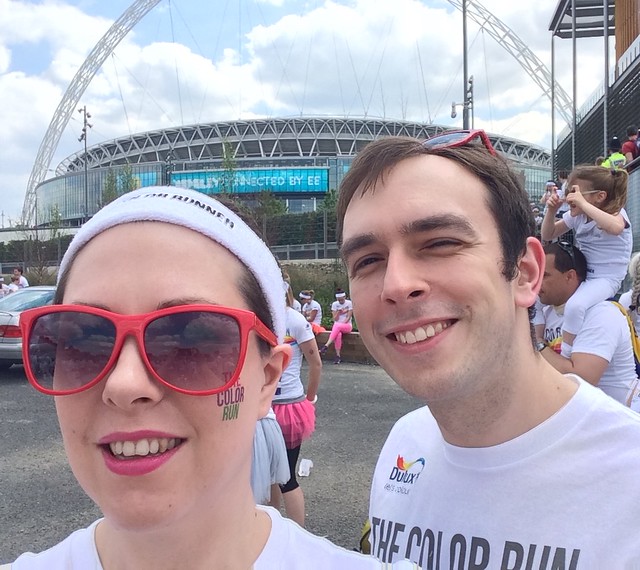
After checking out the Go Ape course, we decided to head on home, but not before one final photo to show off my new helmet!
In my first wet weather cycle, I learned the following things:
- My trainers do not have a good grip on the pedals when they’re wet.
- It doesn’t take long for your saddle to get soaked.
- My waterproof jacket is not all that waterproof.
- Brakes make scary noises in the rain.
- Wearing a helmet makes you forget how wet you’re getting.
- And most importantly, cycling in the rain is still good fun!
Big Bike Celebration
It’s a very exciting time to be into cycling in the south – even if you didn’t decide to get your knickers off for the Naked Bike Ride today, you can still join in the fun on Saturday 25 June at Weston Shore for an amazing variety of bike-related events. And, you not only get to wear your clothes, but I’m pretty sure everyone else will be wearing theirs, too.
I spoke to Thea Bjaaland, active travel project co-ordinator in Southampton, about the event, and she helpfully gave me these flyers to share with you. She also told me that last year, this event attracted 2000 people – amazing! There are some great activities planned, including some led bike rides which look like fun – I hope to get a place on one of these (they’re first come, first served – and you don’t even need to have your own bike, as bike and helmet hire for these are free!).There will be food stalls as well, and Thea promised ice-cream, which should be enough to entice anyone to attend. A variety of organisations will be present, including Sustrans, Southampton City Council, Solent NHS Trust, Southampton Cycling Campaign, Transition Southampton, Active Nation and the Veteran Cycle Club. We’re pretty lucky to have so many organisations working together on an event like this.
The event takes place between 11 and 4 on the Saturday, near the Pitch and Putt. There’s parking available, but I reckon you should come on your bikes – right?
My thanks go to Thea for her help in gathering this information!
Halloween Marshmallows
This weekend I’ve had the pleasure of spending a lot of time with Life is Sweet, by Hope and Greenwood, which is, as it so rightly says on the cover, a collection of splendid old-fashioned confectionary (buy it if you get the chance! It’s very reasonably priced and ever so good). I’ve made marshmallows, fudge and cinder toffee, and although the cinder toffee wasn’t the best I’ve ever tasted, I was particularly pleased with the fudge. However, as Halloween is coming up, I thought I’d make some spooky Halloween marshmallows by colouring them purple. The vanilla marshmallow recipe in Life is Sweet is unfortunately misprinted and the ingredients list is screwed up, so I’ve adapted my own from the recipe for Mallows D’Amour. There are a few technical aspects to this recipe which might prove difficult – you need a stand mixer (although I did experiment with an electric handheld whisk, and the patient might just be able to cope like this, holding it for around 15 minutes!) and a sugar thermometer. I had to borrow both of these, but a sugar thermometer is a great investment for making fudge, toffee, caramel and jam.
Halloween Marshmallows (adapted from Mallows D’Amour, Life is Sweet by Hope and Greenwood)
INGREDIENTS
- 450g (1lb) granulated sugar
- 1 tbsp liquid glucose
- 1 sachet powdered gelatine
- Good dab of purple colouring paste (I used Wilton’s Violet)
- 1 tsp vanilla extract
- 2 large egg whites
- Cornflour and icing sugar, to dust
- Purple sugar/black stars or any Halloween themed decorations
METHOD
- Line a 20cm/8inch square baking tin with baking parchment or greaseproof paper and dust with cornflour and icing sugar. I’ve found you need a heck of a lot of this to keep the marshmallow from sticking.
- In a deep, heavy bottomed saucepan, add the sugar, glucose and 200ml of water and stir. Place over a medium-high heat and add your sugar thermometer. Keep cooking until the temperature reaches 127C or 260F. This could take 15 minutes or as long as 25, so keep an eye on it.
- Whilst this is happening, put 100ml of boiled water in a bowl and sprinkle over the gelatine. Stir well until dissolved. This will really smell. Gelatine is not suitable for veggies, and from the smell of the gelatine, you will know why. Don’t panic, the smell goes away, and there is no taste of the gelatine whatsoever in the finished marshmallow. Now that would be Halloweeny…
- When your gelatine and water is mixed well, add the vanilla and a good dab of purple colouring. For Halloween, you could also try black, orange and green – just remember that the colour will fade because of the egg whites, and the dusting of sugar and cornflour. When you add the food colouring, you should get a very dark colour. So much that you are secretly thinking ‘oh dear, I put too much in’. This will most likely give you a subtle shade…
- When your syrup has reached the right temperature, you need to have a little panic attack and start jumping up and down and worrying you’re not ready. Don’t worry if you haven’t mixed your gelatine yet – I did this and it turned out all right. Just add it to the pan of sugar syrup and mix well. It’ll bubble, so watch out.
- Get your stand mixer and whip the eggs until stiff peaks form. Turn the mixer down as slowly as it will go, and add the syrup and gelatine in very gently. Slow, slow. This could take a while… The heat from the syrup is heating the egg whites, so if you pour it on too fast, it’s likely the word could implode.
- When you’ve done this, you turn the speed up to superfast and leave to beat for at least 15 minutes. The mix is ready when it holds onto the whisk well, and is thick and shiny.
- Pour into your dusted pan. Leave it to set for a long time – the book says 2 hours, but I’ve left mine overnight before.
- Turn the marshmallow out onto another dusted piece of parchment paper. If you’re like me, the mix will still have stuck to the bottom of your originally dusted piece of paper, so dust all sides until nothing is sticky. Then, slice and dust, slice and dust, into whatever shapes you like. Once you’ve dusted your marshmallows, you can shake off the excess coating by throwing them gently from hand to hand. Store in parchment paper.
- Serve with edible sugar, as above, or with anything suitably Halloweeny…
How about black sugar stars, like the first photo? Or purple sanding sugar, like the photo above?Or, if you want to be more sophisticated, why not keep your mallow mix white, and then decorate with tiny gold stars? (I got mine from Jane Asher’s site.)
These are too good to give to Halloween trick or treaters…